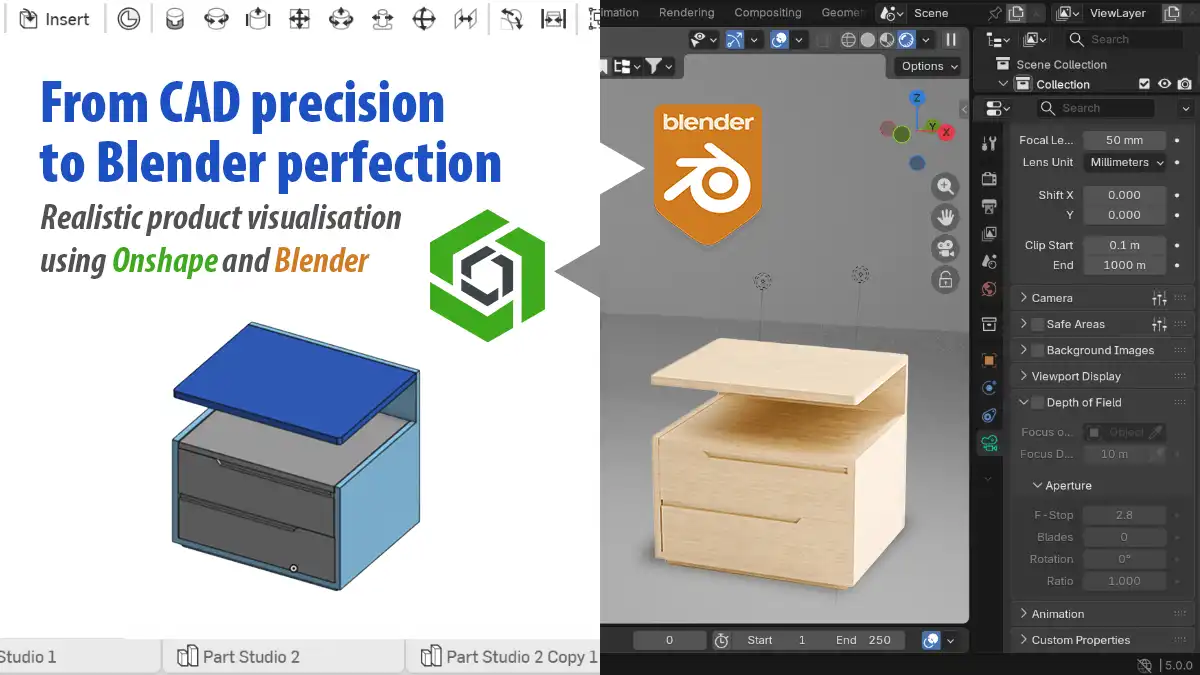
Learning how to turn precise 3D CAD models into a polished, realistic product visualisation using Onshape and Blender
Creating a 3D product model and presenting it professionally are two different challenges. CAD software helps designers build accurate geometry and maintain real-world dimensions, while rendering software makes it possible to communicate how a product could look in the real world.
Onshape and Blender can work together to support both of the processes. Onshape is useful for building dimensionally accurate, editable product models, while Blender provide tools for materials, lighting, camera positioning and realistic rendering.
In this tutorial, we will explore a practical workflow for taking a product model from Onshape into Blender and preparing it for a professional presentation.
What you will need:
- Onshape: for creating and editing the dimensionally accurate 3D model
- Blender: for material, lighting, scene setup and rendering
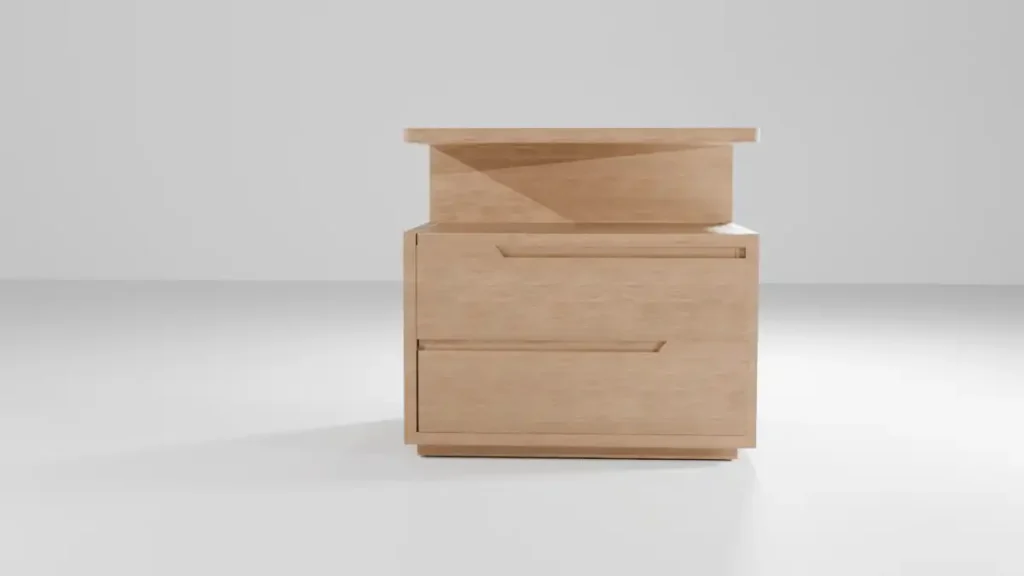
- A product model: this can be a product you modelled, e.g., (cabinets, chair, etc)
Step 1: Prepare model in Onshape
Before exporting the model, make sure that its geometry is ready for visualisation.
Open your Onshape document and review the main components. Check that the proportions are correct, the parts are positioned properly, and you’ve removed unnecessary geometry. For a furniture model, this might mean checking the relationships between the seat, legs, backrest, and support. For a product enclosure, it could mean checking casing, openings and separate panels
If your product contains several parts, give them clear names where practical. This makes it easier to identify components when you export them into Blender.
Step 2: Export the model from Onshape
Once the model is ready, export it in a format that Blender can import
Two common options are:
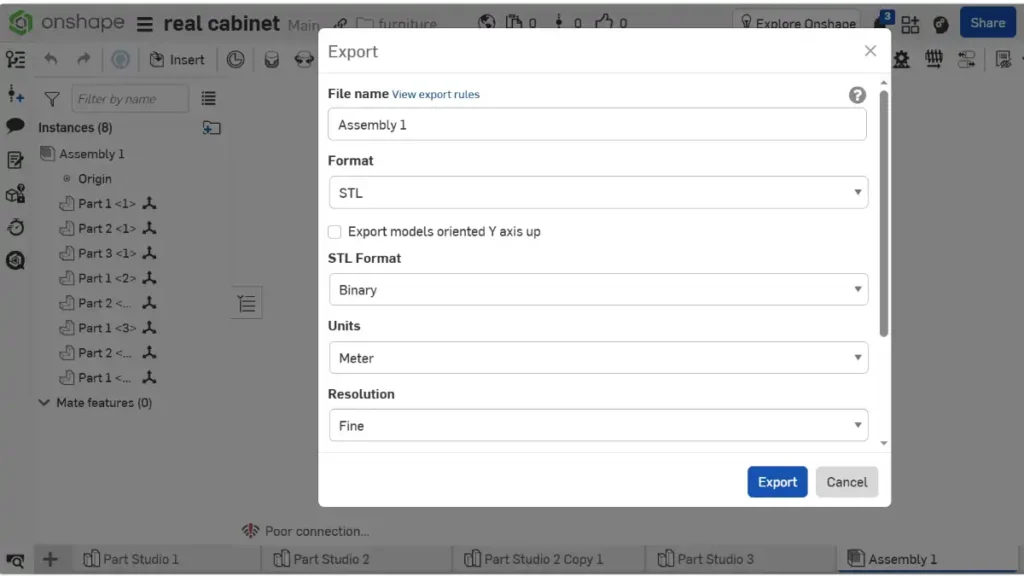
OBJ: Useful for transferring mesh geometry and, depending on the export settings, material-related information
STL: useful for transferring surface geometry, but it does not preserve the same assembly and material information as richer CAD formats
(To export, move your mouse to the part studio or assembly you want to export, right-click and press Export. You will then name your file, choose the format and then export it )
NB: If you are using meters as units in Blender, also make sure that you export your model in meters
Step 3: Import the model into Blender
Open Blender and start a new scene or use an existing project
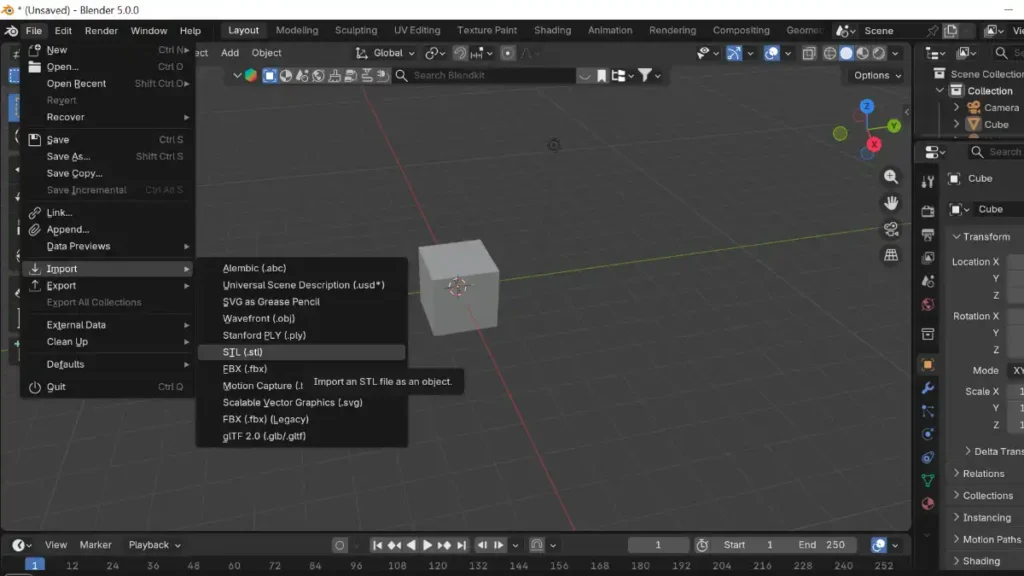
Import the exported file using Blender’s relevant import command. After importing, inspect the model in the viewport
Check three things:
- scale: does the model appear at a sensible size?
- orientation: is it facing the correct direction
- 3geometry: are all expected parts presented and positioned correctly
If the model is too large or too small or rotated unexpectedly, correct the import setting or object transforms as appropriate.
NOTE: ( To export press files, import, then choose either STL or OBJ )
Step 4: Set up material
This is where the model begins to look like a real product rather than a technical shape.
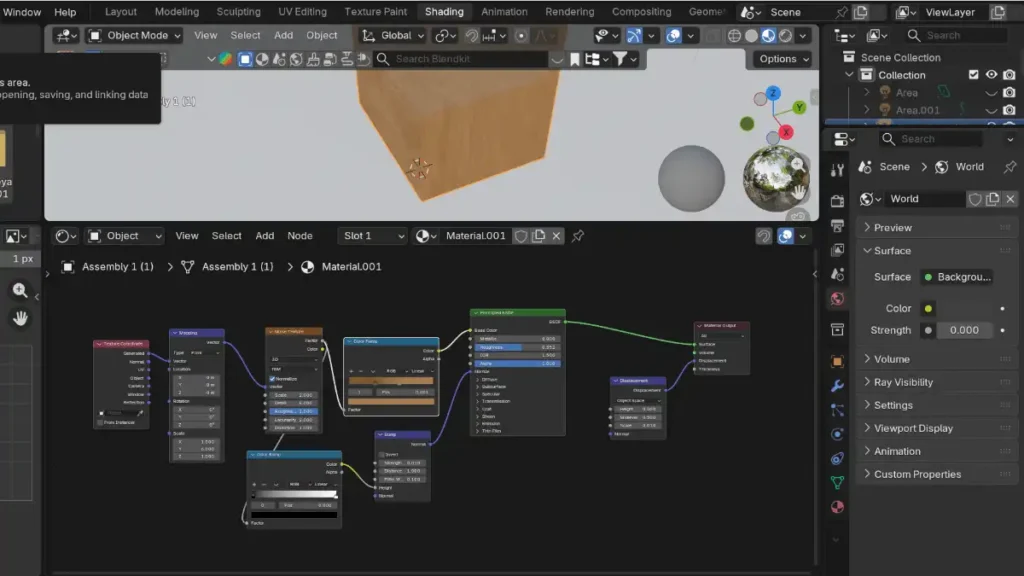
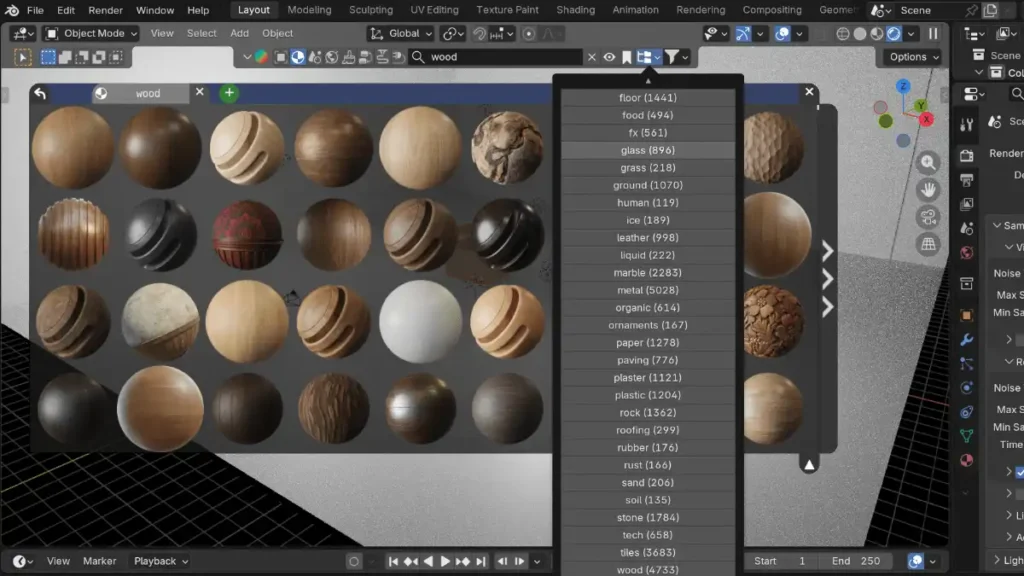
In Blender, select a component and create a material using the Principled BSDF shader. Adjust its base colour, roughness, and metallic value to represent the intended surface
NOTE: You can either choose to learn Blender nodes, where you can learn about (mapping, noise texture, displacement, colour ramp, etc.) OR YOU CAN JUST DOWNLOAD A BLENDER KIT WHICH HAVE LOTS OF FREE MATERIALS)
STEP 5: Creating a lighting setup
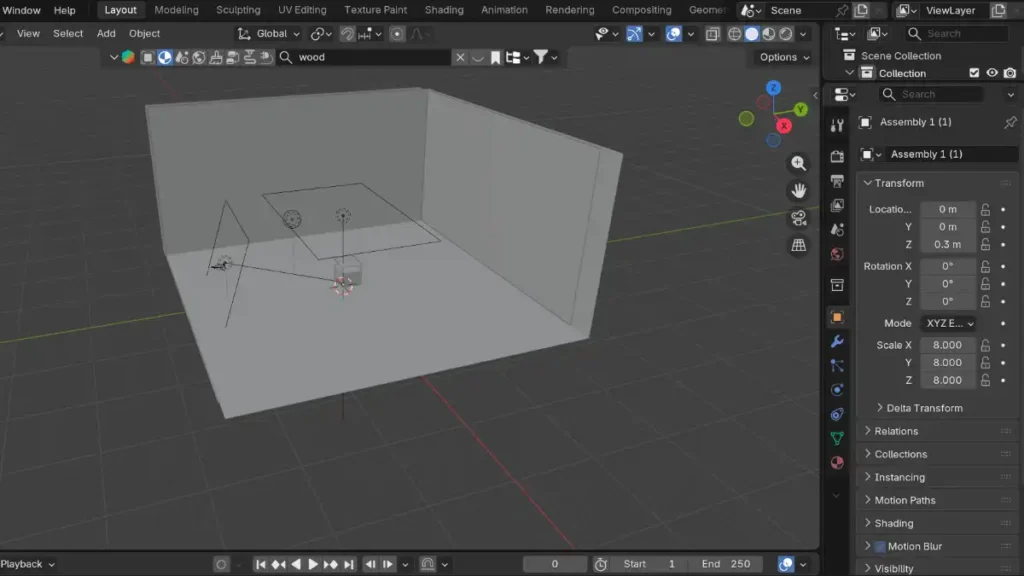
Lighting strongly influences how materials, shapes, and details appear. For a simple product presentation, use a large area light as the main light source. Add a softer fill light to reduce harsh shadows and a back or rim light if you want to separate the product from the background. A plain studio background is often a good starting point because it keeps attention on the product.
Step 6: Position the camera
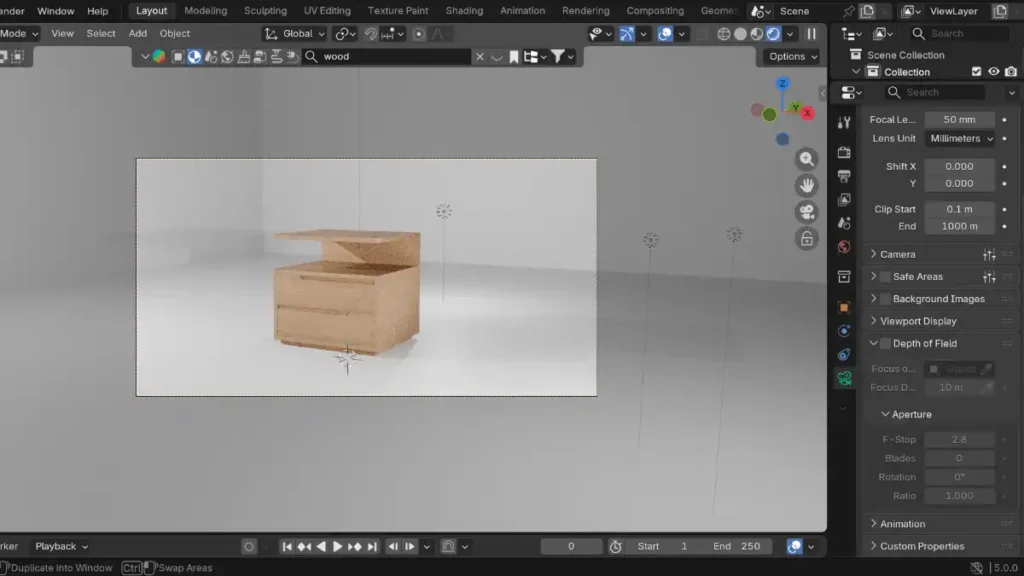
Choose a camera angle that communicates the product’s most important features. A three-quarters view is often a useful starting point because it reveals the front and one side of the object. For products with important internal features or complex construction, additional views may be more informative.
In Blender, position the camera and adjust its focal length and framing. Make sure the product fits comfortably within the image, and that important details are not hidden behind other components
For a product catalogue, maintain consistent framing and camera angle across related products. This creates a professional and cohesive presentation
Step 7: Render the final image
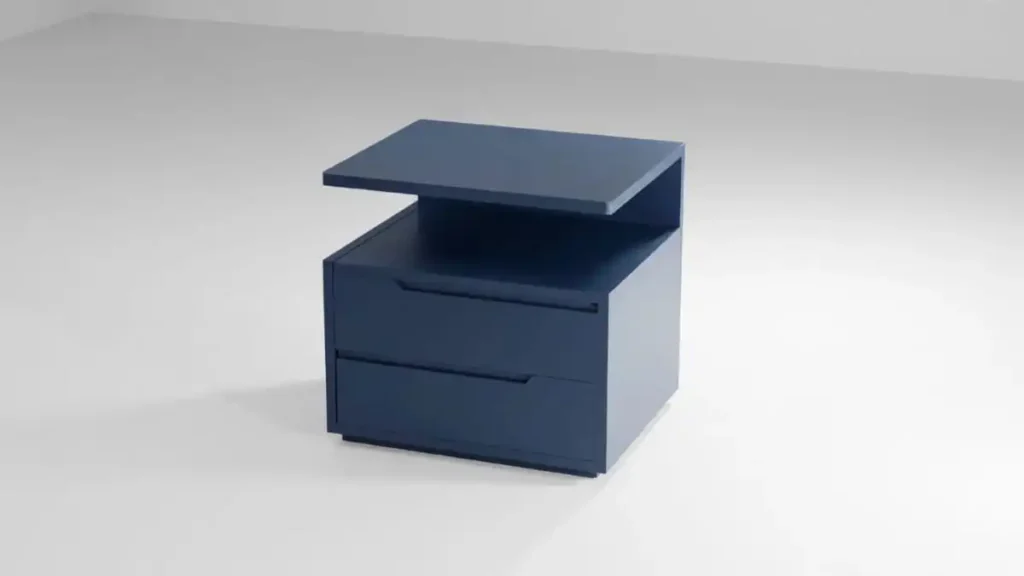
Before rendering at a full quantity, create a low-resolution test render. Check for missing, unwanted shadows, noisy reflections, awkward camera framing and visible geometry problems. Fix the issue before increasing the output resolution and render quality
Blender’s Eevee and Cycles render engines offer different approaches to rendering. Eevee can be useful for faster previews, while Cycles can provide more physically realistic lighting and reflections, depending on the scene and settings
Choose an engine that suits your project, hardware, and quality requirements. Once the preview looks right, increase the resolution and render settings to produce the final image.
Conclusion
Combining Onshape and Blender creates a practical workflow for designers who need both dimensional accuracy and strong visual presentation. Onshape provides the CAD foundation while Blender helps communicate the product’s material, finish, proportion, and appearance. By preparing the model carefully, exporting it in a suitable format and building a considered material and lighting setup, you can turn a technical model into a polished product visual.
The most important lesson is to treat modelling and visualisation as connected stages of one workflow. A well-prepared CAD model makes the rendering process easier, while a thoughtful Blender scene helps others understand the design.
Written by Riise Mudzanani
Useful Links:
- Onshape.com
- Learn Onshape: https://learn.onshape.com/
- Blender.org
- Cabinet model to be downloaded – (workflow_cabinet_demo.stl)
About Riise Mudzanani
Riise Mudzanani is a furniture and product designer exploring the intersection of CAD, 3D design, and visualisation. She uses Onshape to develop precise 3D models and technical designs, and Blender to bring furniture, products, interiors, exhibition booths, and kiosks to life through materials, lighting, and rendering. Her work focuses on practical design workflows that connect technical modelling with compelling visual presentation.