Article by Nik Kottmann of Blender Daily
Like all 3d software, Blender is pretty complex and has thousands of features. No matter how long you’ve been using it, from time to time you’ll always find a new tool, shortcut or little trick that you didn’t know existed. I’ve been collecting that kind of tips for the last two years and posting them on my Instagram account Blender Daily. Here is a collection with 10 of my favourites.
1. Auto Updates
A really cool thing about Blender is, that it is constantly being updated. There’s a new version coming out four times a year with exciting new features and improvements. As awesome as this is, it also means that you always have to download new versions to stay up to date. But did you know, that this process can be automated? Install Blender from Steam or via the Microsoft Store and you’ll always get the newest version without having to manually reinstall. Another cool advantage of using Blender with Steam is the possibility to track the amount of hours you spend using Blender.
2. Walk Navigation
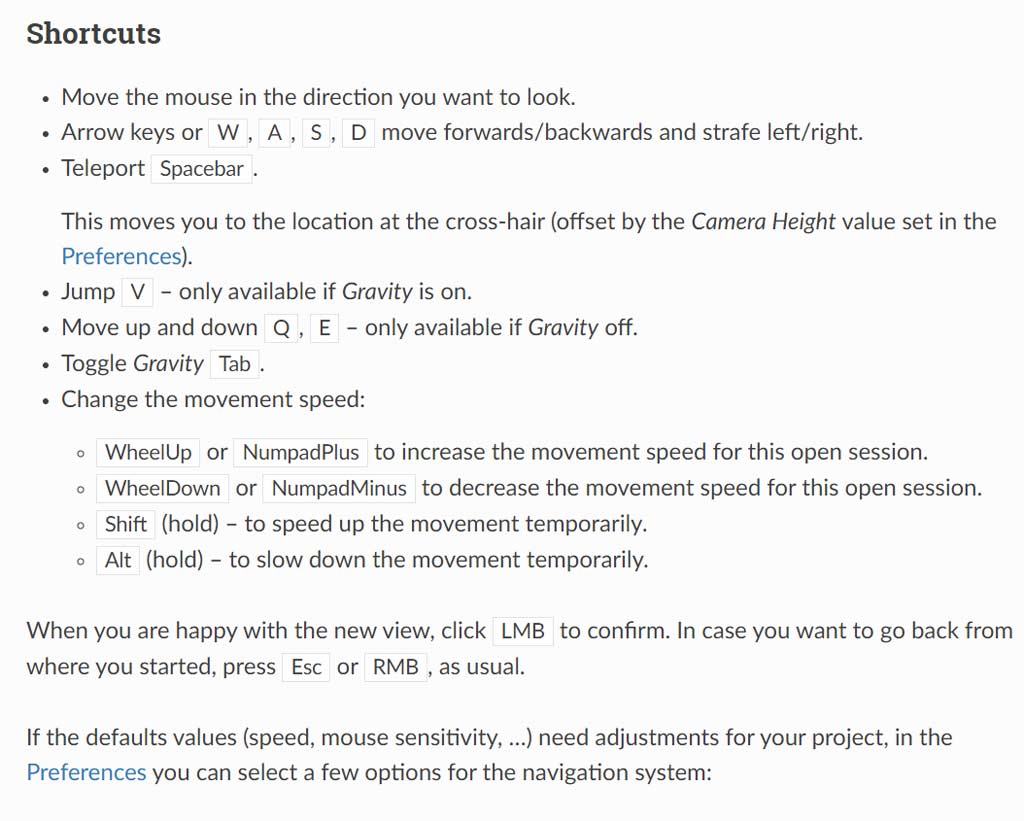
The right camera placement is essential for a great render. In my opinion moving the camera with the grab tool isn’t very intuitive and can be quite laborious. This is why I prefer to use the walk navigation. Go to View > Navigation > Walk Navigation to enable it. Now you can control the camera as if you were in a first person shooter and use the arrows or W, A, S and D keys to look around. To toggle the gravity simply use the Tab key.
3. Photogrammetry
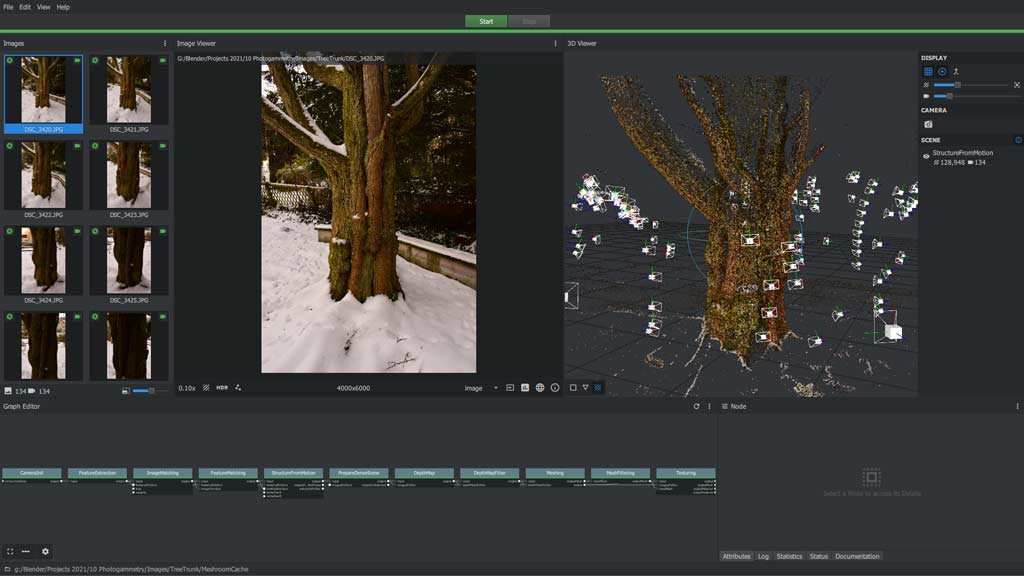
I recently came across Meshroom, an open-source photogrammetry software. Photogrammetry is a really cool technique to create 3D scans by taking photos from all around an object. Meshroom is 100% free and very intuitive to use. I had lots of fun during the last few weeks scanning various objects and using them to create realistic scenes in Blender.
4. Coloring the Wireframe and Blueprints
When you do a lot of modeling from blueprints you probably know this issue: In orthographic view, the lines from the reference image become indistinguishable from the wireframe. This makes modeling very hard and unpleasing. An easy solution for this can be found in the viewport shading menu. Change the colour of the wireframe to random and it will be easier to differentiate the edges from the blueprints. Another option, that I actually prefer, is to open the blueprint in an image editing software and change the colours of the lines. This is very simple but extremely effective!

5. Split Viewer Node
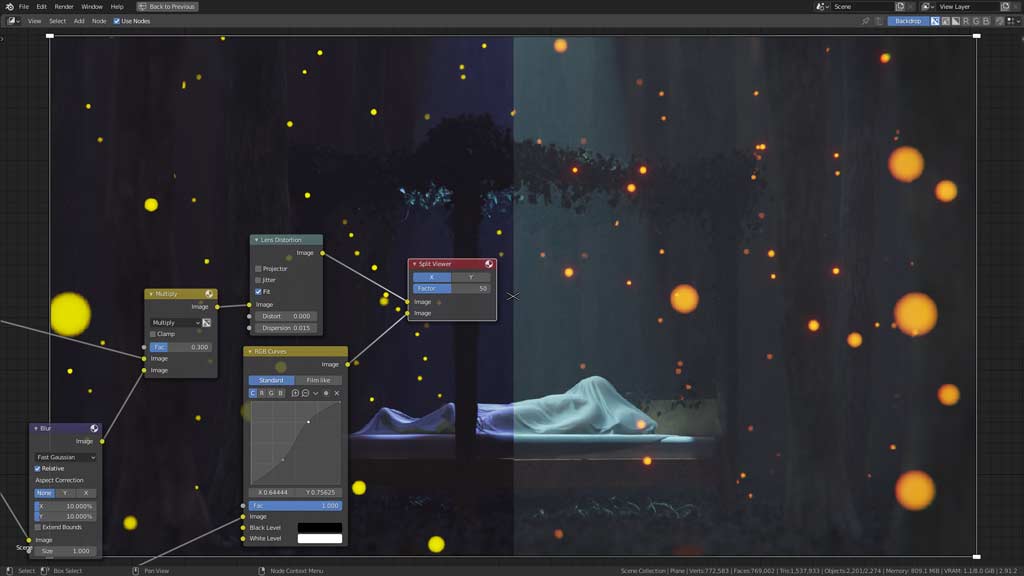
I am a big fan of the node based compositor in Blender, but I always get annoyed by how slow it is. This makes comparing two different outputs in the node tree practically impossible. Fortunately there is a solution: The split viewer. This node replaces the default viewer and has two input sockets that are displayed next to each other. To see them you need to enable the backdrop in the top right corner of the compositor. I use it all the time when post processing my renders.
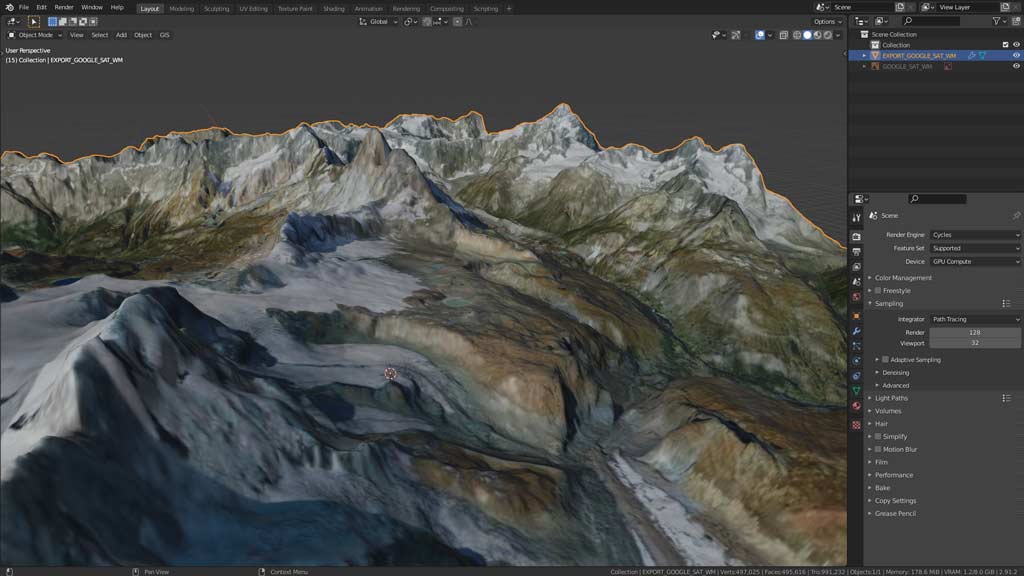
6. Blender GIS Add-On
This is one of my favourite add-ons. It allows us to import real-world terrains from Google Earth into Blender. You can download it for free from GitHub.
After installing the add-on you should find a GIS menu in the top of the 3d viewport. Choose Basemap under Web/Geodata and proceed with the default settings. A map of the world should be loaded into the viewport. The shortcut G brings up a search menu and brings you anywhere you desire. Increasing the zoom level to a value around 12 seems to be right most of the time. Then use the Middle Mouse Button and Mouse Wheel to move around adjust the zoom. When you are happy with the selected area, press E to project it onto a plane. This is already pretty neat but the terrain data is still missing. For this purpose go back into the GIS Menu and this time choose Get Elevation. The default settings should be fine. Let it load for a few seconds and a displacement map will be added to the plane. And there it is, a real-world terrain in Blender! Beware, that this add-on uses real-world scale. Your plane might be multiple kilometres long.
7. Batch Rename
If you have lots of objects in your scene it is important to keep them organized and name everything accordingly. This is a really boring task, especially if you have lots of object names that need to be changed. In this situation the batch rename feature comes in as a real lifesaver. Press Ctrl + F2 to open it up. Then use the find and replace fields to rename a specific word in multiple objects at once. This tool has quite a few more features for renaming and organizing. I explain all of them thoroughly in a recent tutorial.
8. Blender Benchmarks
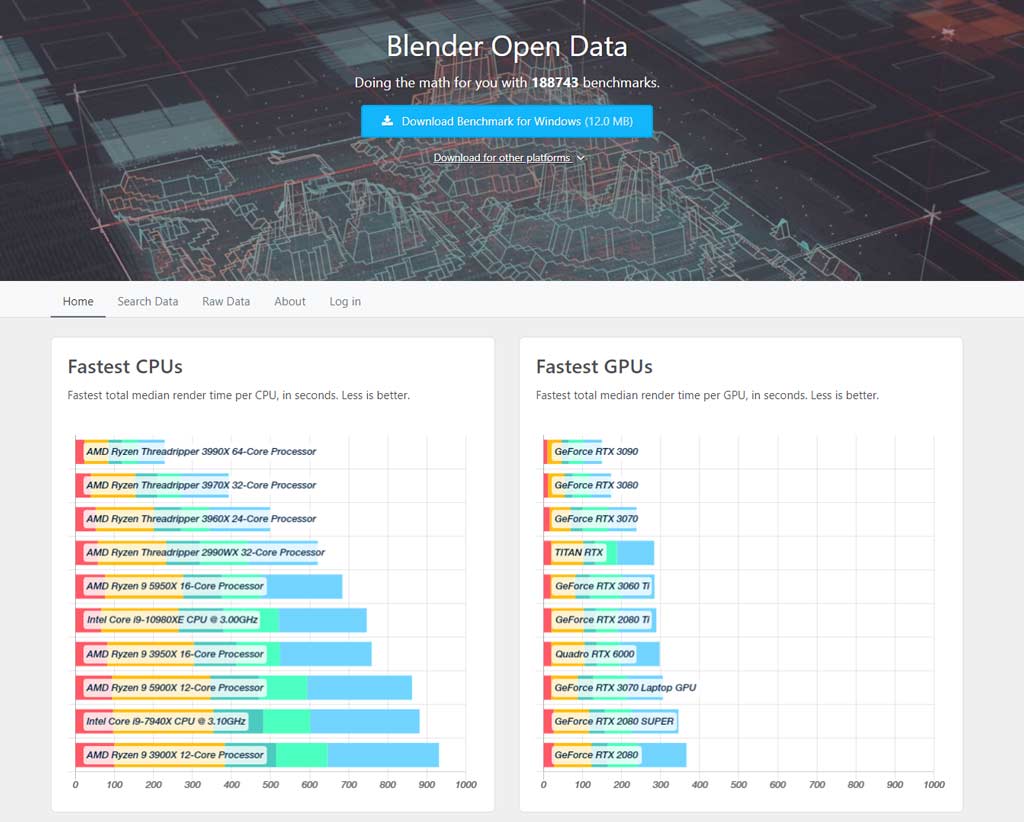
Are you thinking about upgrading hardware to speed up rendering? If so, you should definitely visit opendata.blender.org. This is an official page by the Blender Foundation, designed to compare the performance of different graphic cards and CPUs for rendering. You can even do your own benchmark renders and compare your current setup to the performance of other GPU’s and processors on the market.
9. Default File Paths
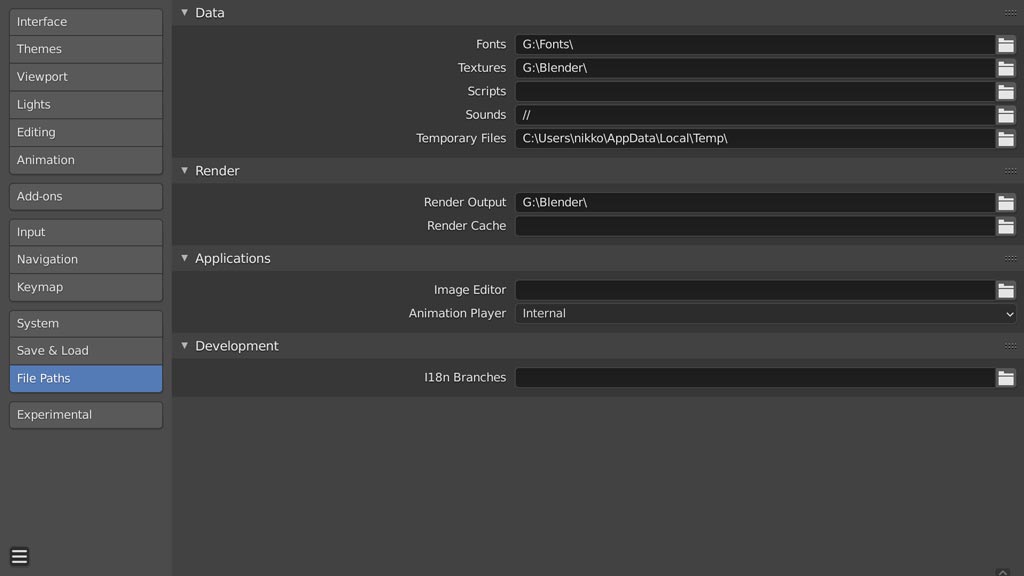
Setting defaults for the file browser can save you a lot of time in the long run. Go to Edit > Preferences and on the left side choose File Paths. Here you can preset locations for individual data types.
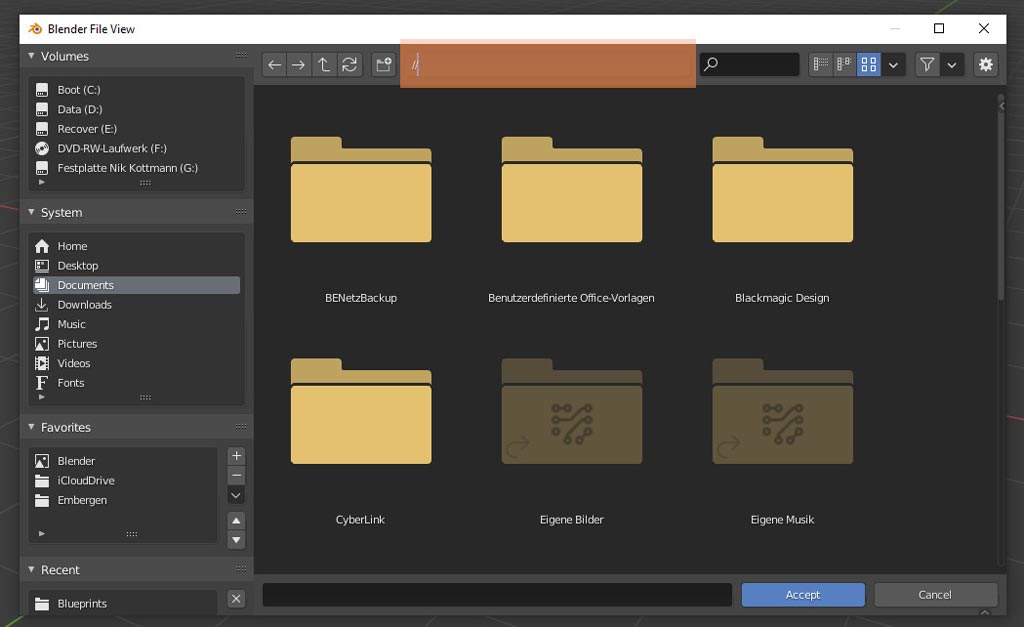
There’s another useful tip for file browsing I use all the time and don’t want to withhold from you. Type // in the file path field and it will take you directly to the current directory (folder where the blend file is saved).
10. Blenderkit & Sketchfab Add-On
Have you heard of the Blenderkit or Sketchfab add-on? They both provide an online library with awesome free Blender assets and a plugin to directly search and import them from within the 3d viewport. The Blenderkit add-on is even preinstalled with Blender and just has to be enabled in the user preferences. Sketchfab is also free, but you must first download it from GitHub. In addition to 3d models, Blenderkit also offers materials and brushes. They are really useful to quickly import assets to fill up the scene.
This was a selection with 10 practical Blender tips, that you can hopefully use for your next 3d project. In case you are hungry for more, I’m not going to let you down. I can offer you a video with 50 more useful tips or you could just drop by my Instagram page www.instagram.com/blender.daily, where I post a new short tutorial every single day!